I just completed this project on Saturday and it has added a great outdoor living space and really brightened up our front patio area.

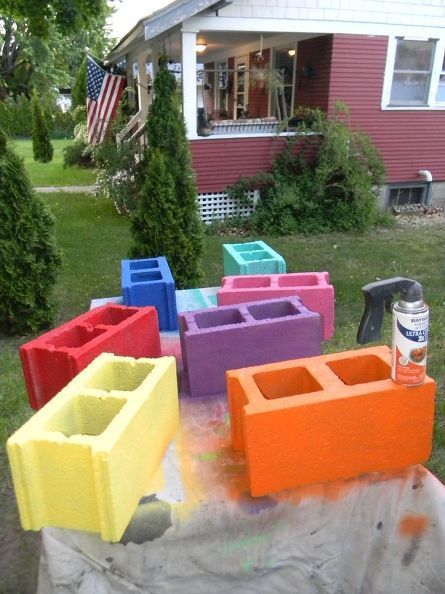
Plain cinder blocks ~ BORING!
I began by prepping the basic cinder blocks with a cement primer/sealer. This will prevent the cinders from absorbing more paint than necessary when applying your colors.

Bring on the CoLoR!
Pick your colors and spray away! You could choose one color for a solid colored base or multiple colors like I’ve done above. I applied two coats letting them dry in between.
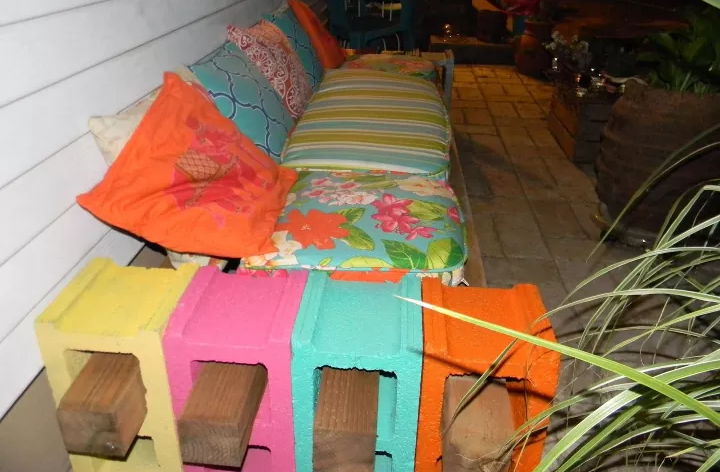
Add 4x4x8 wooden beams
Four 4x4x8 weatherized beams will be needed to construct your seating area.
I got ahead of myself and didn’t stop to take pictures of setting up the cinders.
There are a couple of options as to how to set the cinder blocks up. You can stand the cinders on end in a row of four and place the beam in the top opening, or you can top the row of 4 cinders with an additional 2 cinders placed horizontally and thread the beams through those openings.
It really just depends on how high you want your seat to be from the ground. When you are happy with your cinder block placement you can then use cement adhesive to secure their placement and to enhance stability.
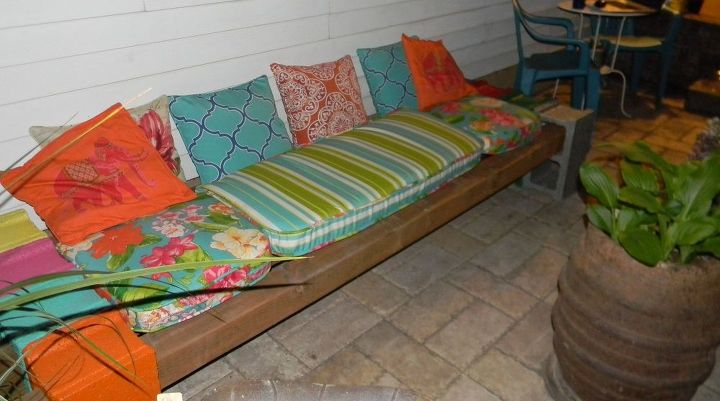
Plenty of room under the bench for storage
Add your cushions, arranging them to your liking. There is plenty of room under the bench to store your cushions during the off season.
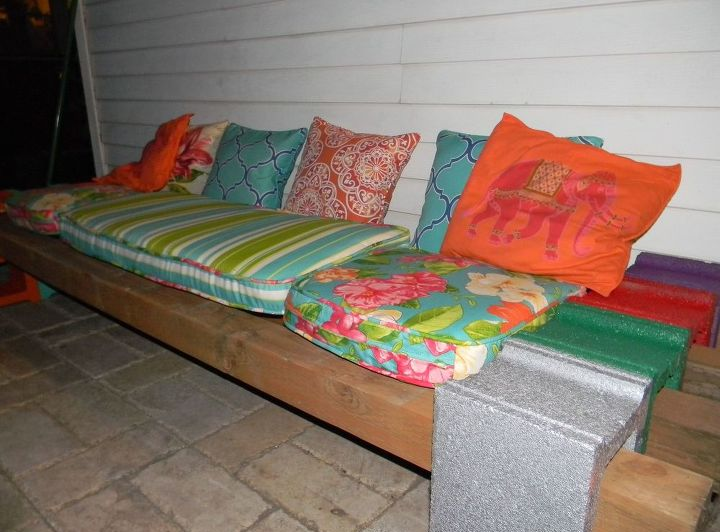
Sit back, Relax & Enjoy your new seating area
Invite your friends over, you’ve got plenty of room for them to sit and enjoy your new outdoor space full of color & light!